If you're the type of cyclist who counts their yearly mileage figures in the thousands, you've probably experienced a gear hanger failure at one time or another. To anyone that is unaware of which part we refer to when we say gear hangers, let us explain.
As anyone who has ever experienced a gear hanger failure will tell you, it's pretty inconvenient. Having a gear hanger break on you, mid-ride is normally terminal for the chances of that particular ride. It almost undoubtedly results in a taxi ride home or begging the better half for a lift. But there are ways in which you can minimise the possibility of such a failure and maximise the lifespan of your bike's gear hanger.
How do gear hangers fit and what do they do?
Instead of the man with no name, think of this as the part with many names! Namely; gear hanger, mech hanger, or derailleur hanger. However, they are all one and the same and attach the rear derailleur to the frame. Being a sacrificial part, they are designed to bend or break in the event of a crash or impact. Should such an impact occur, the hanger bends to prevent potentially catastrophic damage from occurring to either the frame or derailleur.
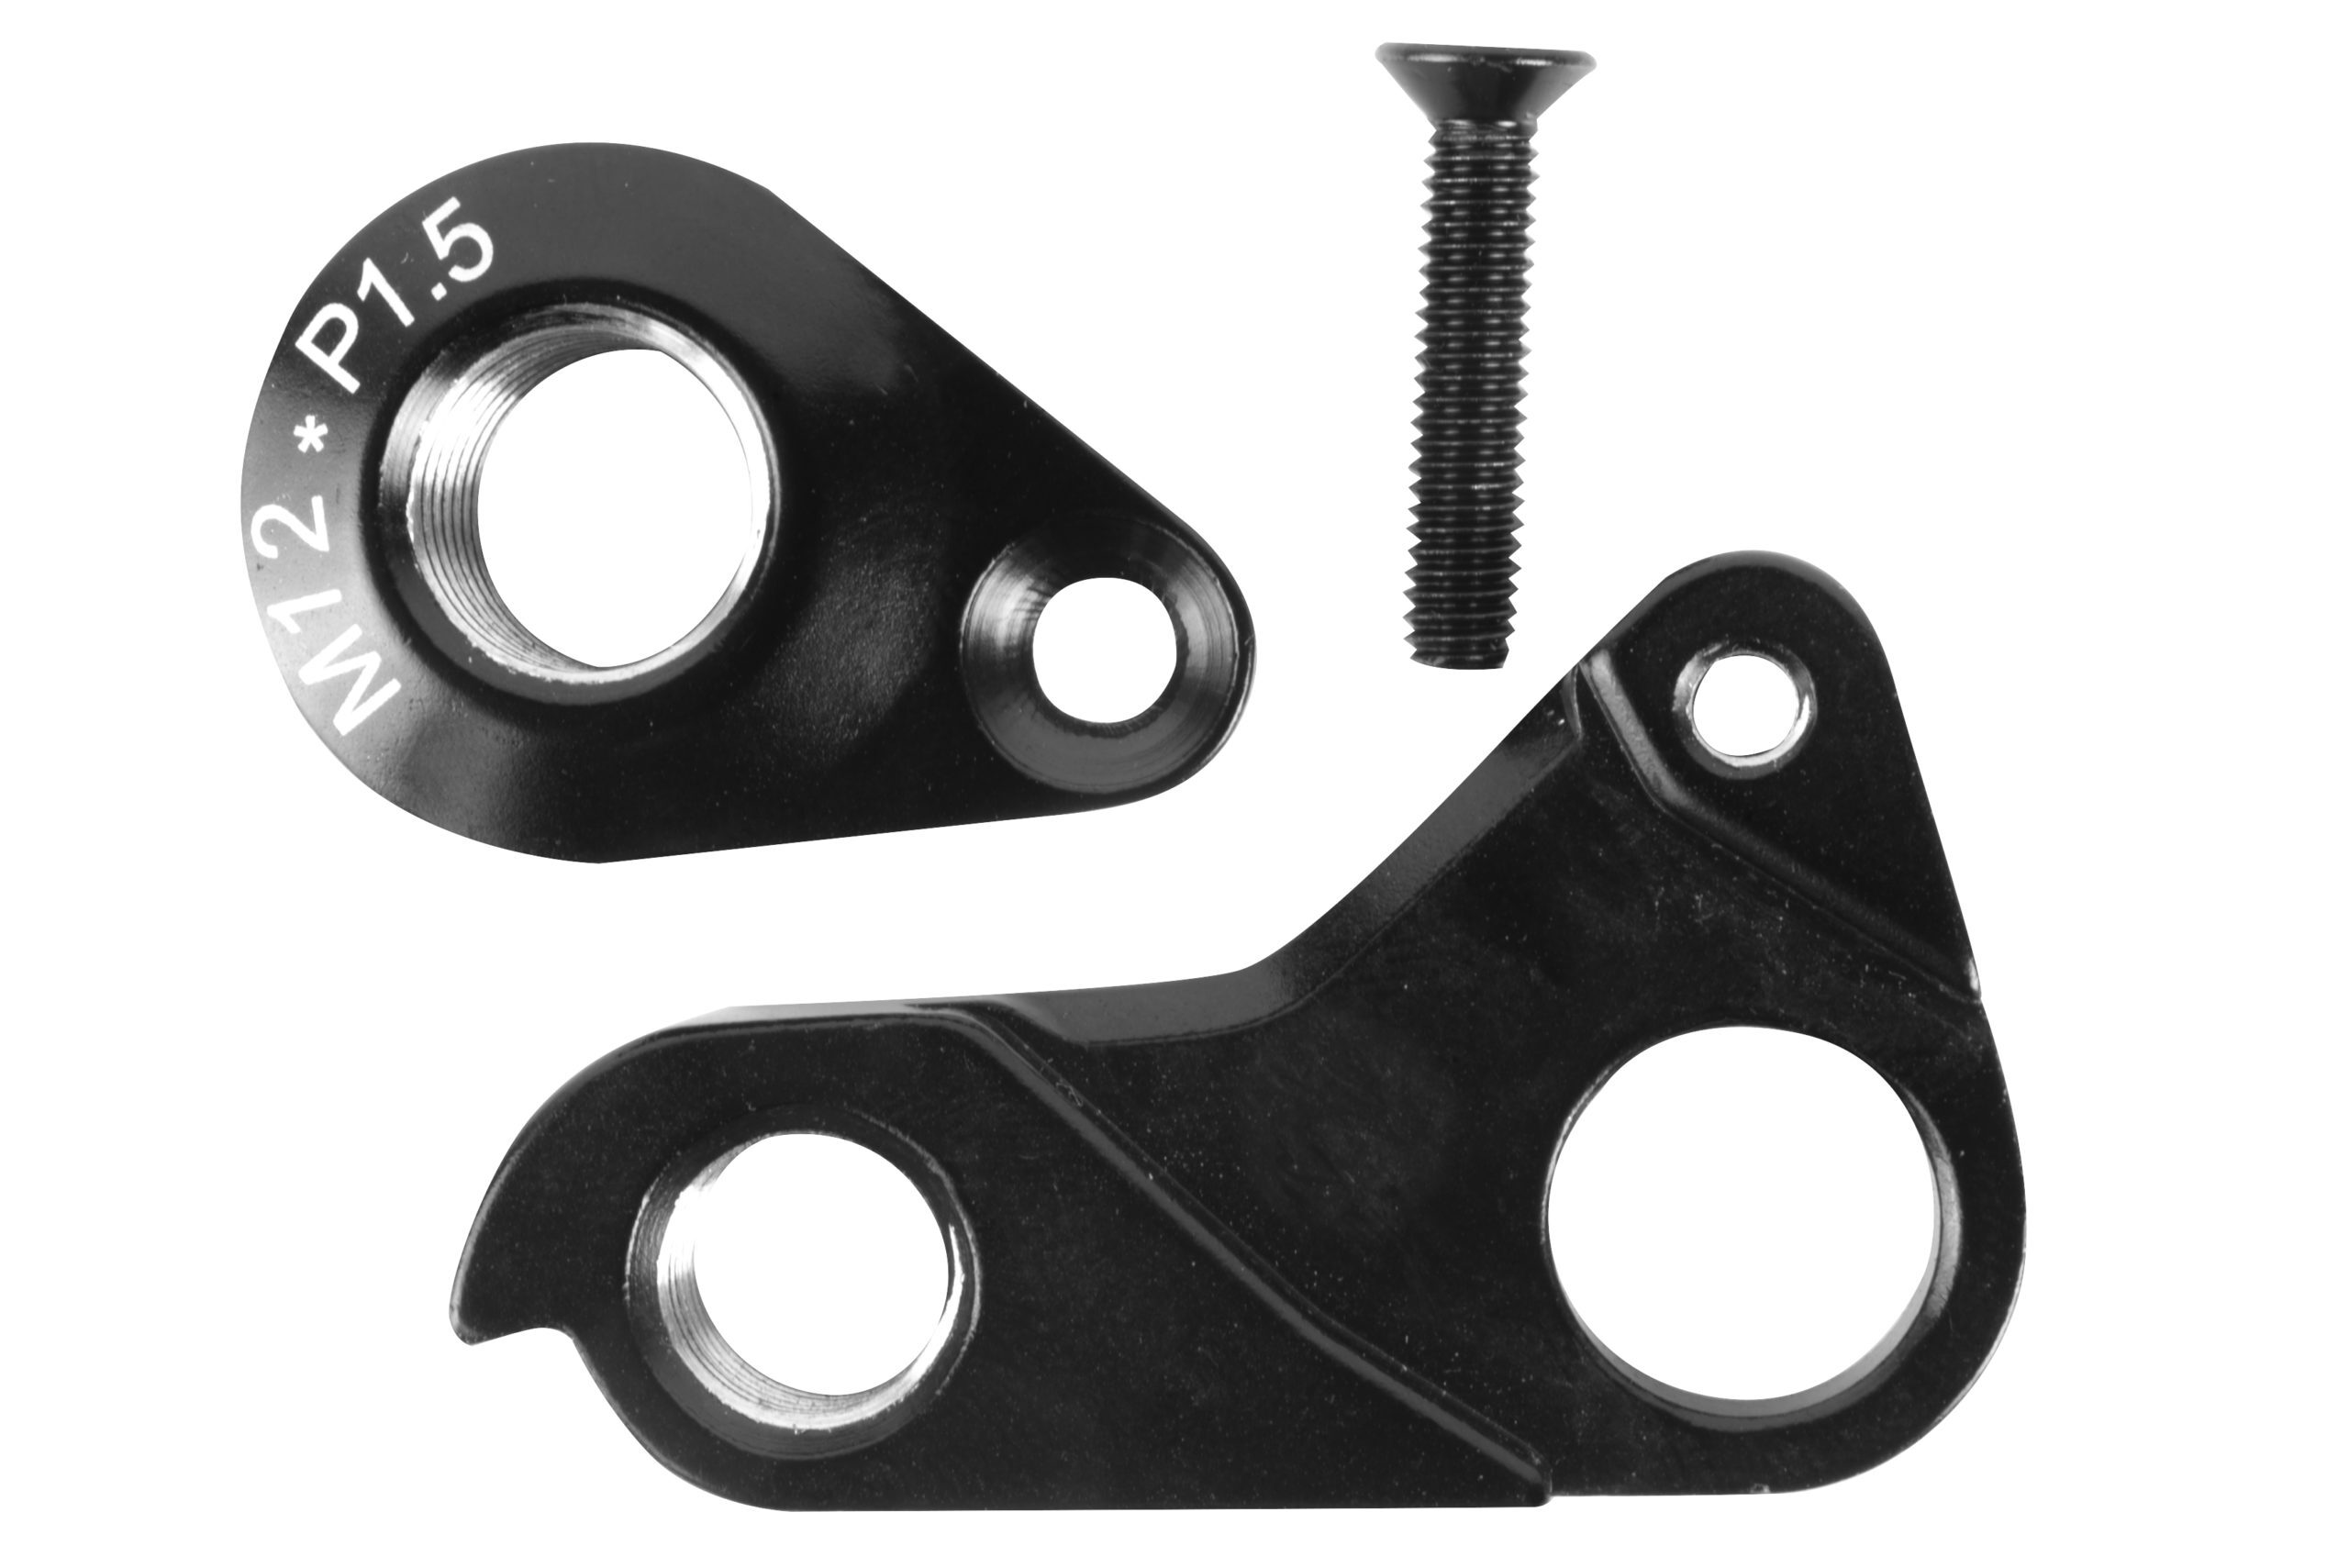
The SL carbon gear hanger is compatible with our entire range of SL carbon frames.
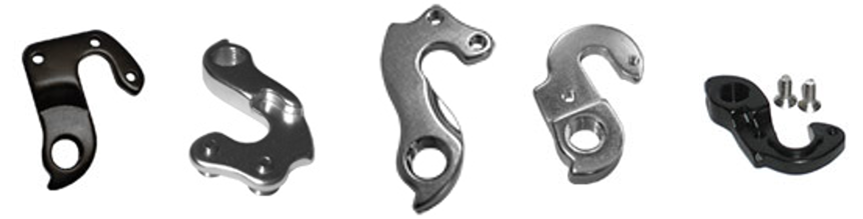
The gear hanger is bolted to the frame's dropout at one end and the rear derailleur is attached at the other. It is affixed to the frame by way of one, two, or in some cases three countersunk bolts. If you have ever searched for a gear hanger online, you will know there are literally hundreds of variants.
Bikes from different genres will almost certainly require a specific model of hanger that is specific to that particular frame. This can make finding the correct hanger a bit of a bind. Thankfully, here at Ribble, we've simplified this process by designing frames that share the same hanger design where possible. For instance, our entire SL carbon family of bikes all use the same hanger.
Here is a gear hanger in action - blink and you'll miss it!
Why do they break and how to avoid it! (Overshifting)
So now we've explained what they are, let's get down to the nitty-gritty of what causes most failures. You may recall us stating earlier that hangers are made from a soft metal that's designed to break under extreme load? This may sound a bit strange, but the reason for this will become increasingly obvious. It's to protect the more expensive parts of the bike, firstly the frame and then the rear derailleur, in that order.
These are, if you like, the ‘weakest link’ in a bike’s drivetrain. However, if it boils down to replacing a hanger that costs £20 or a derailleur in the region of £30-£300, it's really a no brainer! Then there's potentially the cost of a new frame to factor in. It's therefore clear to see why gear hangers are designed to work in the way that they do.
There are a few factors that may cause a hanger to fail, apart from the most obvious cause...you know crashes!. The most common cause of failure on a new bike is either damage sustained in transit or user error.
Damage in transit
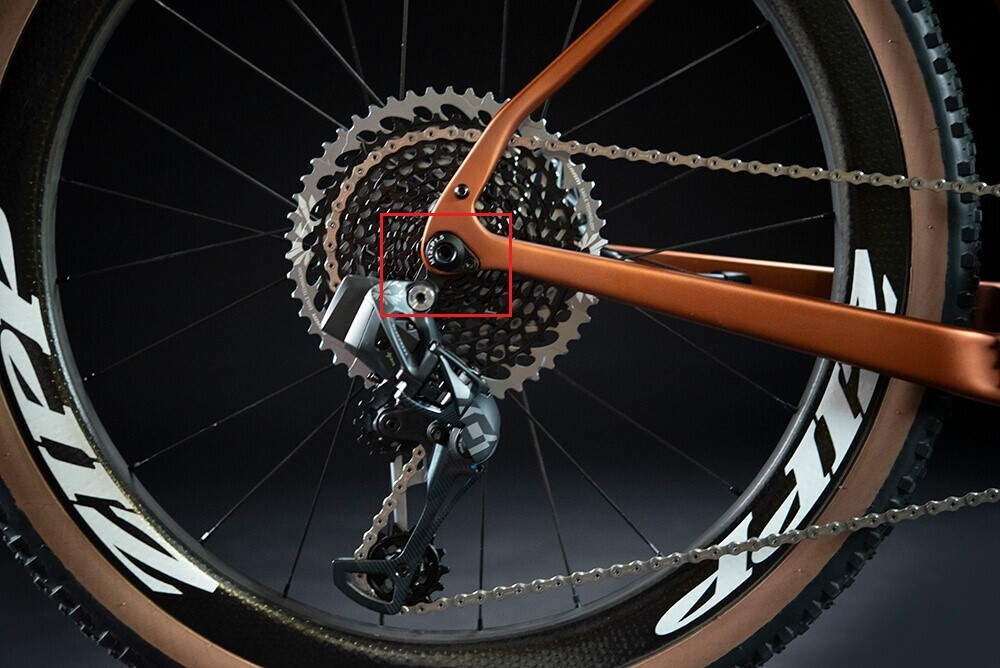
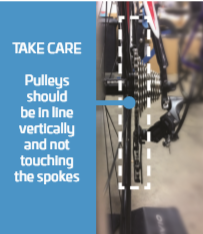
Despite our packing team's best efforts, it is possible (though thankfully rare) that the bike can arrive with a slightly bent hanger. Therefore, we advise all customers to check the bike over upon delivery and pay particular attention to the gear hanger. The way to check for this is to look at the bike from behind and see if the top pulley on the rear derailleur is aligned with the cassette sprocket directly above it. If it isn't, you are likely to see the hanger itself is bent in towards the wheel slightly.
User error
User error as a term sounds a little harsh, maybe a better way of putting it would be 'rookie error'.
- If the bike arrives with a slightly bent hanger and no action is taken to rectify it, the gears will be out of alignment. If you then take it out for its maiden test ride the gears are liable to slip under load. The already stressed hanger could then fail with dramatic effect.
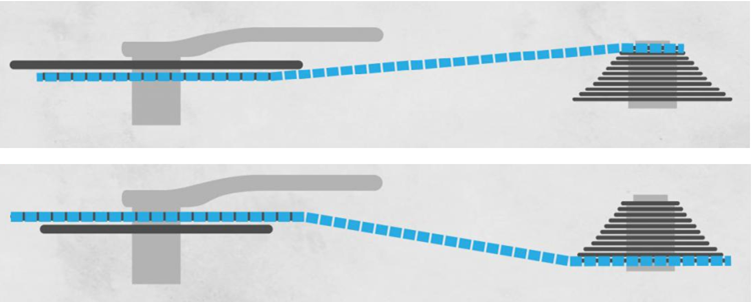
The top image demonstrates an example of cross chaining in small/small and the bottom image big/big.
2. Being in the wrong gear combination - In cycling, there is a phenomenon known as 'cross chaining'. This occurs when the chain is in a big/big or small/small configuration (see image above). In these gears, the chain sits at an acute angle which places the most stress on the drivetrain. In this position, the chain is likely to chafe against the chainring, sprocket and front derailleur. This is to be avoided at all costs, as it will result in premature wear of the components.
Another issue that crops up from time to time is one that can be attributed to anybody - from beginners to seasoned cyclists. You need to shift gear when climbing. Doesn't sound too bad so far, does it? But what happens if you get to the point that you can barely turn the pedals and need to change gear?
Well, by this point, you've already left it too late, when you do eventually shift the gears let you know in no uncertain terms that you've erred. A horrendous crunch emits from the drivetrain as they protest at their mistreatment! In extreme cases, will result in an immediate hanger failure and the walk of shame as you work out the best way to get home.
Other reasons
Other common factors that can cause a problem are.
- An incorrectly fitted or worn chain. An essential tool in any cyclist's armoury is a chain checker.
- A chain that is too short for the chainset/cassette combination fitted. If you ever replace a chain make sure it's the same length as the one removed.
- Debris in the chain and/or derailleur.
- Incorrectly indexed gears.
How to prevent hanger failure, Do's & Don'ts
Do keep your chain well maintained. Clean your chain regularly and apply lube once it's dry. The same goes for your derailleur, cassette, and chainset. A clean drivetrain works much more efficiently and will extend the lifespan of the components.
Do check your chain regularly for stiff or possible bent links.
Do ensure that after fitting any new parts to the drivetrain, the gears are set up correctly – reset and adjust if necessary.
Do make sure that you are in the right gear for starting off and climbing. Always start off in the small/inner ring at the front, and ensure you are in a suitable gear combination before the road ramps up on a steep climb.
Don't lay your bike down or transport it derailleur side down. The most obvious example of this is when transporting it by car. The rear derailleur should always be facing upwards.
Don't lean the bike precariously, whether this is up against a wall, other bikes etc. Ensure that it's stable and unlikely to fall over, such a fall is highly likely to bend the hanger.
We hope you have found this guide helpful? The advice given goes some way to ensuring that your gear hanger lasts as long as you have the frame. And that you won’t have to try and limp home if one does snap on you!
Have an older model of Ribble frame and want to know what gear hanger you need? Find out what you need here.
For the correct gear hangers to fit the current range of Ribble frames click here.